Showing posts with label Freezer paper stencil. Show all posts
Monday, September 24, 2012
Marvelous Monday link party
Today I participated in a link party at Marvelous Mondays, hosted by Brittany from the Sapphire Bee. Go check out some of the other posts!
Here are some of my favorites of the link up:
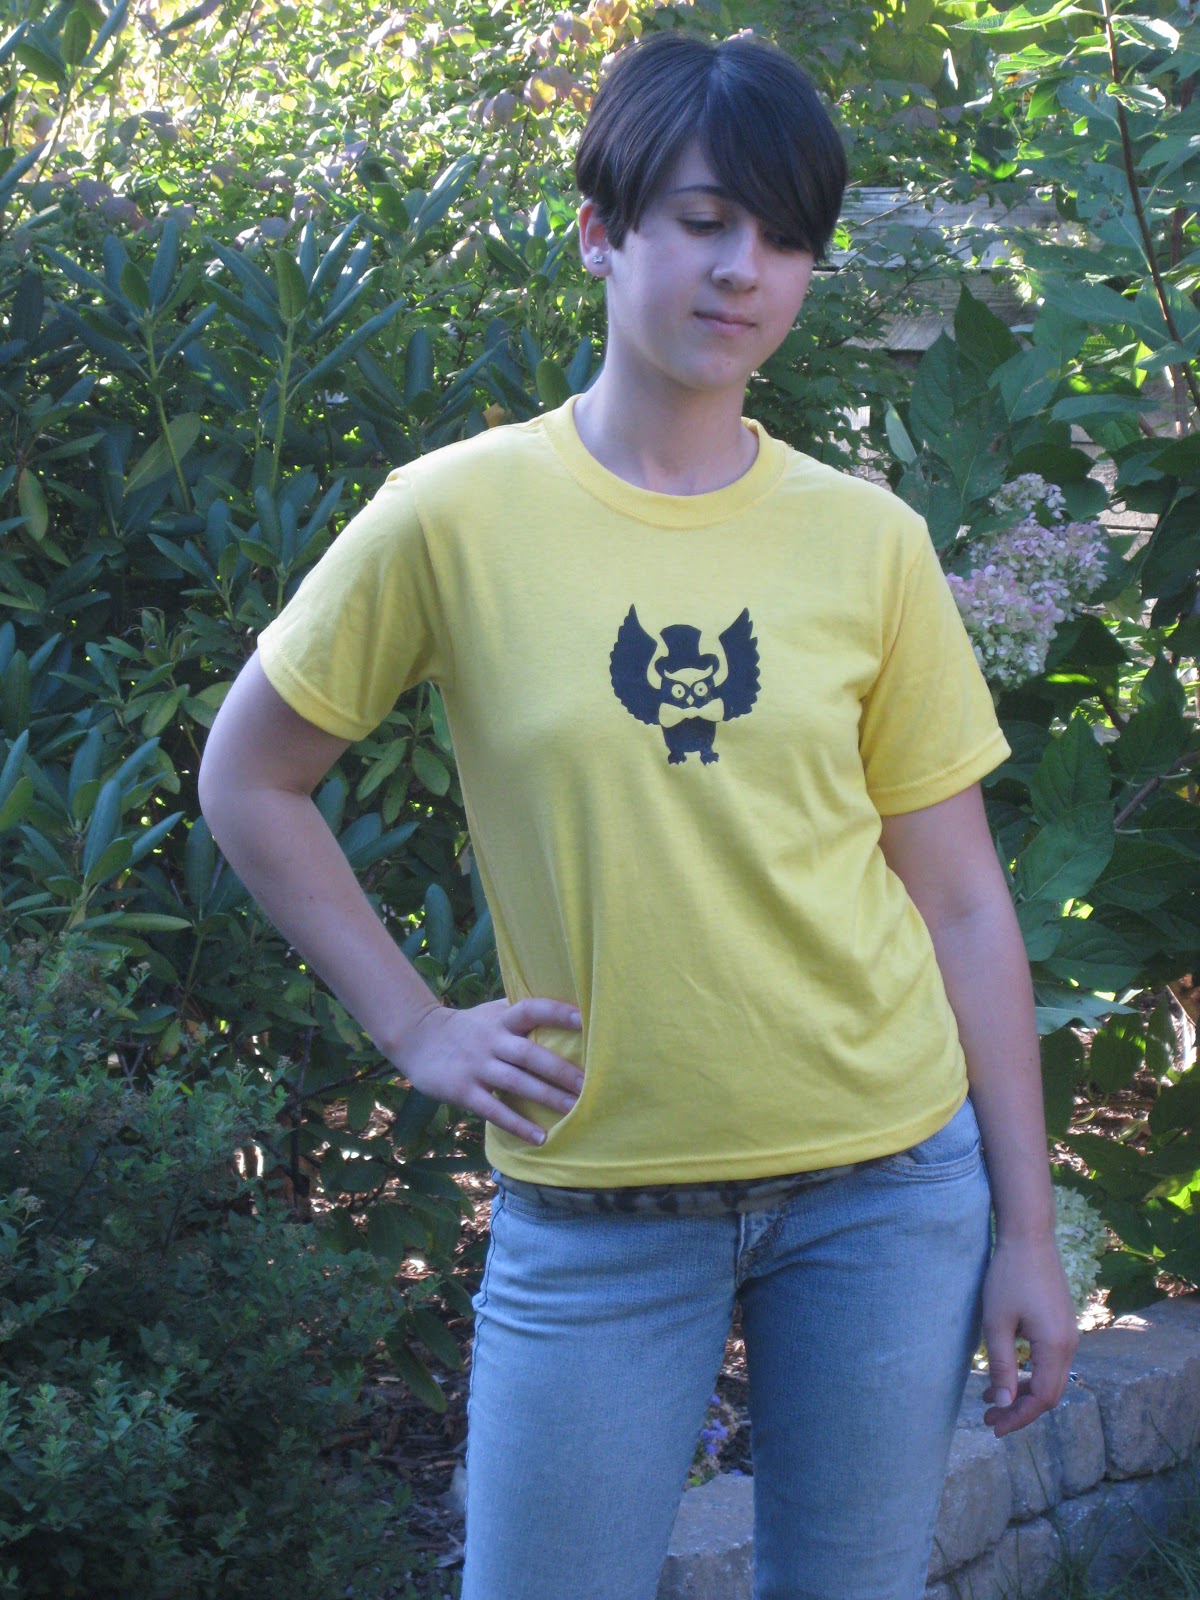
I myself posted the Owl T-shirt (made with the freezer paper stencil)
Saturday, September 1, 2012
Owl T-Shirt (Freezer Paper Stencil)
The moment has finally arrived the freezer paper stencil tutorial! A freezer paper stencil is a handy little technique for quick easy projects. It involves cutting out a design from freezer paper, ironing to the fabric then painting. This is also the same technique I showed Michele (Short Girl, Long Island).
When my brother was up here we were looking up ideas for t-shirts. That's when I came across this book on the interwebs. I first came across Russian Criminal Tattoos when I was in High School. I was always fascinated by them perhaps it was how tattoos ranged from the quirky to the extremely bizarre. I had completely forgotten about them until we came across this cool looking owl.
To make the final design of the shirt work, I had to scale back a few of the details. Even so I think the final product came out great.
Here is how you can make your own t-shirt using a freezer paper stencil
Materials & Tools:
- Freezer Paper
- Pencil
- Design*
- Exacto Knife
- Iron
- T-Shirt
- Paint
- Foam Brush
- Piece of cardboard
Instructions:
- Map out your design. It is important to think in terms of negative space, a concept that is hard to grasp. So if you are a beginner at this I recommend silhouettes.
- Once you have your design figured out, trace it out on a piece of freezer paper. Make sure you trace SHINY SIDE DOWN! That is the side that sticks to the fabric
- After your design is cut out, I colored in all of the areas that were not going to be used. (You will noticed that some areas, like the eyes and bow-tie, are not colored in)
- Take your exacto knife and start cutting out your owl! I recommend starting with the small pieces that you need to save. Its both easier to cutting on these first and it also gives you the chance to put them aside in a safe place.
- When you pieces are all cut out, iron them to the shirt. (shiny side down!)

- Prepare your shirt and iron it out. Then place a piece of card board in the shirt. (so the paint won't bleed through the other side)
- Next is the fun messy part, painting! Grab your foam spounce brush and start painting over the stencil. Be careful with some of your smaller pieces. Paint those areas first incase the stencils come off, like my owl eyes.
- When the paint is dry, peel the paper off of the shirt.
- Heat set the paint and go over the design with an iron
- Be proud you made something awesome!
Go ahead and make your own freezer paper stencil designs, I would love to see them when they are done!
-Sarina
Wednesday, August 22, 2012
Craft Date with Short Girl, Long Island
So do you have any friends on Facebook that you actually haven't met in person? I have a few and one of them was Michele from Short Girl, Long Island. She is a bit older than me but we hung around similar circles and she was always the friend of a friend but I had never actually met her! We also went to school with each others brothers, weird! (also that sounds like a pretty cool band name) So we decided to hang out and have a craft night. We have a lot in common and I have a feeling it was the first of many craft nights.
Michele brought over some stuff to make coasters. It was a fun craft that was simple and ended up looking great! Michele has a tutorial over on Short Girl, Long Island, so go check it out!
I dug around to look for some stationary to use for my coaster. I came across a bag I had saved from going to the Harry Potter exhibit. It was a cool bag that was worth saving (so don't judge me). The coaster does a good job, in my craft room I usually have some tea or coffee and now I have a coaster to rest my mug on so I don't risk ruining any projects! Here is my finished coaster!
I introduced Michele to the freezer paper stencil technique. I have referenced it a bunch of times before but have yet to post a tutorial and I promise you it is indeed coming! While doing it with Michele, I did some experimentation and make bug. After it had dried I took some sand paper to it and it came out looking distressed. What do you think?
Michele brought over some stuff to make coasters. It was a fun craft that was simple and ended up looking great! Michele has a tutorial over on Short Girl, Long Island, so go check it out!
I dug around to look for some stationary to use for my coaster. I came across a bag I had saved from going to the Harry Potter exhibit. It was a cool bag that was worth saving (so don't judge me). The coaster does a good job, in my craft room I usually have some tea or coffee and now I have a coaster to rest my mug on so I don't risk ruining any projects! Here is my finished coaster!
Saturday, August 18, 2012
Friday Night Sew In
A while back I came across this on the blogosphere, Friday Night Sew In, run by the blogs Handmade by Heidi and Crafty Vegas Mom. I thought it was a neat idea, its Friday leave me alone and let me work on stuff!
Its no secret that Halloween is one of my favorite times of year! This year I am so thrilled to be able to decorate the house! I have a few ideas already and thought since I had the time why not get some stuff done while I have some time.
Pinterest is chock full of decorating with bunting. For those not familiar bunting are the little flags on string. I decided to get some Halloween bunting going by using some burlap and the freezer paper stencil technique. It comes out looking pretty nice and can be used for other occasions, such as weddings.
Be sure to check back soon and I will have a tutorial posted!
Also if you want your kids to get in on the crafting action I made some bats. This was for a Summer Reading club program I did, Bats at the Library. I loved the bats and thought they were so cute (and easy to make) I decided to make a few for the house. Also they are made with a clothespin so you can clip any old place you want.
Its no secret that Halloween is one of my favorite times of year! This year I am so thrilled to be able to decorate the house! I have a few ideas already and thought since I had the time why not get some stuff done while I have some time.
Pinterest is chock full of decorating with bunting. For those not familiar bunting are the little flags on string. I decided to get some Halloween bunting going by using some burlap and the freezer paper stencil technique. It comes out looking pretty nice and can be used for other occasions, such as weddings.
Be sure to check back soon and I will have a tutorial posted!
Also if you want your kids to get in on the crafting action I made some bats. This was for a Summer Reading club program I did, Bats at the Library. I loved the bats and thought they were so cute (and easy to make) I decided to make a few for the house. Also they are made with a clothespin so you can clip any old place you want.
I will also have a tutorial for my bat friends. So check back later!
Subscribe to:
Posts (Atom)