Showing posts with label Nerd Craft Librarian. Show all posts

Tuesday, May 13, 2014

Monogram Candle Holder

I have been making some pretty amazing things lately with the help of my glass etching kit. Its a special cream that is applied to a glass service and gives it a frosted or etched look. I've played around with frosted glass spray before, but the etching cream is superior. Etching is perfect for projects with a lot of detail and washable items. I found that the spray wipes off and is not super durable. So the etching cream is perfect for making custom wine glasses and things like that.


Here is one of my latest projects, a monogramed candle holder. It came out looking pretty snazzy. I stuck in my guest bathroom because it needs a little decor. 

Here is how I made it: 

Materials & Tools:

  • Etching Cream 
  • Contact Paper 
  • Exacto Knife 
  • Glass Vase 
  • Gloves 
  • Foam Brush
  • Candle 

Instructions:


  1. Create your stencil. I went with a monogram, but you can use whatever image you like. I recommend something simple and not very complicated. Draw your design on contact paper and cut it out with your exacto knife. 
  2. Clean your candle holder and then apply your stencil to it. Make sure to press out all of the air bubbles. 
  3. Before applying etching cream, wear protective gloves! That stuff is serious business and can damage your skin. 
  4. Apply a few coats of etching cream over the stencil. 
  5. Allow cream to dry. Some of the manufacturer directions vary, but I found waiting 24 hours gets the best results. 
  6. Take your candle holder and run it under warm water and take off the stencil. You will noticed your design has been etched! 
  7. Fill your candle holder with whatever decorations you would like. 

Thursday, May 8, 2014

Q & A - Short Girl, Long Island


You ever get friend requests from random people? I did once, from a girl name Michele who was friends with my older brother. I’m glad I accepted her friend request because she was posting a lot of fun stuff and we had a lot in common. Then we both started blogging and eventually hanging out. Michele is one of my good buddies now! She took a bit of a blog break, but now she is back! I asked her to participate in Q & As!


1. Where can we follow you?

Blog: 
Facebook: 

2. How did you get started and what made you want to start a blog?

After leaving a job in the corporate world back in 2012, I was itching to be creative//start writing again. I was working on my teaching degree + felt like everything I did was for an assignment or task someone else needed me to complete. Decided to start a blog + the rest is history.


3. What are your favorite things to write about?

I really like sharing things I come across in my daily life, which are usually posted in Things I'm Loving Lately. I'm also a music nerd, so I like posting songs I hear in my travels. 


4.  What is currently your favorite thing at the moment?

Zoning out for at least thirty minutes each day with a different record. Technology takes a back seat, I relax + just listen.

5. What are your future plans, expectations & dreams for your blogging endeavors.

Warmer weather is arriving, so I'd like to get some solid shots + capture the beauty//culture on the island. I also want to get more recipes up, since I have a ton floating around my desk. Not sure what the future holds, but as long as i'm enjoying myself + what I blog about, thats all that really matters. 


Follow Michele's links and check her out! If you would like to participate in a future please contact me! 


Tuesday, May 6, 2014

Pointillism Vase


Iron Craft Challenge # 9 is 'Inspired by Art' So it got me thinking of some of my favorite art pieces. One of them is featured in Ferris Bueler's Day Off and Cameron has a serious stare down with a Surrat painting. Its one of my favorite scenes in movie history! 


This painting uses the pointillism technique so I used that as my jumping off point for this project. It involves using a series of dots of varying colors to create a pattern in which an image emerges. Since I wasn't setting out to make a grand masterpiece I applied the idea to a small scale project, a small vase. I used an ampersand design (&) because they are just so neat and visually interesting. After my little vase was done I put some rocks in it and suck a candle in there. 

Here is how you can make one yourself: 

Materials & Tools
  • Glass jar or vase 
  • Contact Paper Stencil 
  • Q-tips 
  • Paint (varying colors)


Instructions: 

  1. Clean your jar/vase with some glass cleaner and dry it to remove any dust. 
  2. Apply your stencil to the jar/vase and press out the air bubbles as best you can.
  3. Take a q-tip and dip it in some paint and start dabbing your jar/vase over the stencil. Continue this step with different colors, until you like your color combination. 
  4. Allow to dry for at least 20 minutes. 
  5. Gently peel off stencil to reveal your wonderful design! 


Friday, May 2, 2014

The Best Thing Ever - Star Wars: Episode VII


When it was announced another Star Wars Trilogy was in the works this scruffy looking nerf herder was estatic! I'm not the only one excited and the rumors have been going around. This past week J.J. Abrams released this picture:


The cast was officially announced!!! It confirmed rumors and pleased many fans to hear that they are getting the gang back together. Luke, Leia, Han, Chewie, R2 and 3PO!

I'm also just as excited to hear about the people Star Wars newbs. Andy Serkis is going to be amazing. I hope plays some freaky motion capture alien creature. There is also a fair share of handsome men, Domnhall Gleeson (he will always be Bill Weasley to me) Oscar Issac and John Boyega (he was really awesome in Attack the Block)

Here is what else we know about the series:

  • It will take place 30 years after the events of Return of the Jedi 
  • This series will not be based on the 'Expanded Universe or anything that happened in Star Wars rebels
  • The film is set to be released in December 2015


Thursday, May 1, 2014

Crayon candles - Library Life

March is national craft month. So I thought be appropriate we do some serious crafting with the teens!


While looking for ideas I came across this project on Brit Co, using crayons to make candles!!! I've always wanted to do a candle making project but it always looks too complicated and dangerous in a group setting. This one however utilizes soy candle wax and a microwave. candle making made easy!


I gathered all of the supplies and we got to work! Go to Brit Co for the full tutorial, but here are some tips that I picked up while adapting this project for a group.

Crayon Candle Tips:

  • Use Crayola crayons. There is some sort of special wax only in Crayola crayons that makes them melt. I tried with other types of crayons and it just doesn't work. Crayola only! 
  • Waiting for each layer. I didn't realize that each layer needed to try before pouring on the next one. So while we waited for each layer, we played a few rounds of Apples to Apples. 
  • Depending on how big your microwave is, you can melt up to four cups in the microwave all at once! That will help if you have a fun program of kids.
  • Be wary of the wicks! The wicks can get a little wobbly, so when pouring in the wax, make sure your keep it straight standing up! Mine shifted to the side and looks weird. 


Tuesday, April 29, 2014

Key Chain Wristlet


My pile of scraps have been growing. So I decided to do something about it and I've been doing a few different scrap busting projects. One of them is making a keychain wristlet. They are easy to make and they look great. They are also really durable. When the strap on my clutch wallet broke, I replace it with a wristlet, and its been working out quite nicely.

Here is how you can make your own: 


Materials & Tools: 

  • Scrap fabric 
  • Snap hook 
  • Sewing machine & notions 
  • loop puller 
  • Iron

Instructions 

  1. You will need two pieces of scrap fabric that measure, 2" by 11" (FYI be careful of the fabric you use, you want something nice a durable, but not took thick because you will run into problems later) 
  2. Place the right sides of fabric together, pin and sew along the long edges. Leave a 1/4 inch seam allowance. Congrats, you made a tube!
  3. Use your loop puller and pull your 'tube' inside out. Use your iron to press the 'tube' so it is nice a crisp
  4. Top stitch along the long edges
  5. Insert 'tube' through the snap hook and fold it so that the two short edges are together. Pin and sew along the short edge 
  6. Flip the strap around, so that the other side is exposed. Move the sewn short edge over to the snap hook. 
  7. Pin and top stitch above where the snap hook is. This way you can cover up the raw edge and give your wristlet a nice finished touch.
  8. Put some keys on it and you are good to go! 

Make one yourself! I've been having a lot of fun making all different kinds of wristlets! 


Thursday, April 24, 2014

Rifftrax with Teens - Library Life

I was a teenager when I discovered Mystery Science Theater 3000 for the first time. It was pretty magical. While channel surfing I came to the sci-fi channel and found a bad old movie on. I soon realized that people were talking over it and making funny jokes! I think a bunch of my friends discovered it around the same time because we would talk about it and have inside jokes influenced by MST3K. Fast forward a few years when as an adult I mentioned to someone how much I loved MST3K. The friend I was talking to, Mark, said "hey those guys are still riffing movies." He showed me RiffTrax. I was ecstatic! It was just like MST3k but with newer releases!


Since it was something I loved so much as a teen, I thought the teens at the library might also get a kick out of it. After mentioning it to the teen librarian, we set out looking up what riffs we could use. We did Avengers first and got a 'meh' review from the kids. We tried it again with the Hunger Games and I was thrilled to see them enjoy it. Here is a trailer for your enjoyment.


This is such a great simple idea to do with teens! All that is needed is a viewing space, a copy of the movie, the audio commentary and a speaker system. We are lucky enough to have a TV in the teen center and showed it on that. I downloaded the commentary from RiffTrax. They cost around four to five dollars. I then put that track on an iPod and used an iHome to play it along with the movie. The hardest part was getting the commentary and the movie in sync, so at first some of the jokes didn't match up. However I had one teen who was hell bent on getting them to match!


Afterwards they asked when we were going to do RiffTrax again. Librarian win! So head on over to RiffTrax and try it out at your library. This could also work with millennials because, like me, they grew up watching MST3K and miss it. If you try it in your library, let me know how it works out!


Tuesday, April 22, 2014

Iron Craft Challenge 8 - Spring has Sprung - Teired planter

Spring is finally here!!!! This means I can start sprucing up the outside of the house. The front of our house needs a serious pop of color. It is very white. I thought a painted planter would help! 

This planter project also meets the requirements of the latest Iron Craft Challenge # 8 - Spring has Sprung! The task for this challenge was to make something inspired by spring or Easter. 


Since big planters can be kind of pricey, I thought about making a tiered planter. Since terra cotta planters are inexpensive, I bought three of varying sizes. I took them home and spray painted them with some color. I painted the top rim gold and the bottom a dark green. After I put it together I realized it looks like a Zelda inspired planter which was no my intention. 


After painting, I began to layer them together with soil and plastic planter turned upside down. That way you don't have a ridiculous amount of soil. After putting it all together it didn't seem very sturdy. I was worried about the wind blowing it over. So I had a dowel in the garage and was able to use that to keep it all together. 

It came out pretty fantastic! Now I just need to put some flowers in it! 


Monday, April 21, 2014

Latest Adventures....

Here are some of my latest adventures....


Last Friday Caitie and I went on a grand journey to Ikea! It is such a magical home decor wonderland. We got so frustrated because we wanted to buy EVERYTHING! I went with one goal in mind, a floor lamp. $70 later I left with a bunch of crap I'm not sure if I really needed. We were both really obsessed with this crazy lamp that looks like the death star when closed, then when open it looks like the death star mid explosion! 


Sadly I left without the buying the lamp....this time! In the middle of our spree we got a bit peckish so we got some food. We had the most delicious elderberry cupcake in the world. I'm really dead set on finding elderberry liqueur just so I can make these cupcakes! It was like a little puff of heaven. It was light with a little buttercream frosting.

I haven't been doing too much on the crafting front, but I do have a few projects lined up. One of them is a part of an Iron Craft Challenge. This next challenge is all about Spring! I'm excited to transition and get away from the cold. I love living in a climate where I get to experience all of the seasons, however I am so done with winter! So for the Spring challenge, I plan on making a tiered planter. I'm going to paint it some nice color and put it on our porch.


This past week was also a special Etsy landmark for me, I've made 70 sales! I know it doesn't sound like much but the fact that I've sold 70 of my handmade items to mostly to people I've never met, is pretty amazing. The big 70th sale was to someone I know very well, my aunt! I'm planning on making her something extra special.


Another sale I made was my first custom order. I'm custom wall hanging sign for someone. It came out great and I hope she enjoys it!


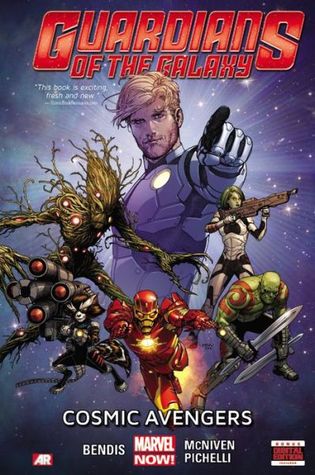
I've been doing a lot of reading lately. Since I got my floor lamp from Ikea, I set up a little reading space and I still their for hours at a time enjoying a good book and some coffee. Its pure heaven! After finishing NOS402, I switched gears and read Guardians of the Galaxy: Cosmic Avengers. The trailer for the movie blew me away, so I figured I'd read about these marvel characters I know nothing about! They are a rag tag team of galactic rejects. Its an enjoyable read and I love Rocket. When he is in a shoot out he says "Blam murdered you" at all of his enemies and its quite silly.


Since Guardians was a quick read, I picked up Prodigy by Marie Lu. I've read the first book in the series, Legend and immediately went into the next one. I think that was a mistake because I was just not feeling it and I stopped. I guess I need a break in between reading a series book, because second time around, I am enjoying it. If you are a fan of dystopia, then go check it out.


Friday, April 18, 2014

The Best thing Ever - Hogwarts is Here


In the library world, there is a lot of talks about Massive Open Online Courses (MOOCs) They are a all about allowing enrollment to anyone interesting in signing up! Many schools have jumped on the bandwagon including some ivy league schools and now... Hogwarts.


Thanks to Hogwarts is here, aspiring witch and wizards can enroll in some of Hogwarts finest offerings, including: Defense Against the Dark Arts, Charms and Herbology. The school has all the aspects of Hogwarts life, choosing a dorm and even writing for the school paper, the Daily Owl.

I myself am enrolled in History of Magic 101. So if you are an aspiring witch or wizard, head on over to Hogwarts is Here and enroll!!


Tuesday, April 15, 2014

Iron Craft - Trends (Nautical Planter)


We have gotten a few little Spring teases. Its gotten warm, then the next day is freezing. The weather may not be agreeable, but I am ready for Spring! I decided if I can't make it happen out side, I'll bring a little bit of spring inside! So I decided to add some houseplants to our decor. I came across these planters at the Dollar Tree and thought I'd decorate them.


This also went along with an Iron Craft Challenge, Trends. Crafters were able to do a project inspired by some of the latest trends, which included floral, geometric or one of my favorites, nautical.

When you live on an island, a lot of people adopt the nautical theme in their houses. I like the motif but some people cover their houses in sea shells with clever signs that say "Life is a Beach" I prefer a more subtle approach to the nautical look. I'm really drawn to nautical stars and compasses. I don't know why but they are just so cool and look old-timey.


So I decided to add some nautical flair to my planter! And it came out pretty snazzy! Here is how I made my nautical planter.

Materials & Tools


Instructions

  • I used pickmonkey and used their nautical star overlay
  • I printed it out and traced it onto some contact paper and cut it out with the exacto knife 
  • I then took my planter and made sure it was nice and clean, then I positioned it on my planter
  • Next it was painting time! I used Martha Stewart's Gunmetal paint 
  • I gave it a coat or two and let it dry 
  • After I let it dry for a bit I peeled off the contact paper to reveal the design


Thursday, April 10, 2014

Little vaca....


Hey yo, here has been my life for the past few weeks. 

Craft night returned! We used scrap paper and made some super fantastic animal silhouette art. A more in-depth tutorial is coming soon! 

I also did another Iron Craft project. For this challenge we had to do something inspired by some of the latest trends. One of the trends is a Nautical theme. I used a nautical star stencil and decorated one of my beauteous planters. 

This past week Tim and I went on a little vaca and visited his Dad in Fort Myers. We kept ourselves busy and ate a lot of good food! 

After this crappy winter I was looking forward to spending sometime in the sun! So we spent some time out by the pool. 


Later that day we took a visit to the Naples Zoo. We saw Tigers (but no loins or bears...oh my) and some other cute animals. We went in the afternoon and apparently thats when the animals like to nap, so we saw a lot of lazy bums. Not all of them were lazy, the giraffes were entertaining. I even got to feed one! 


The next day we got rained out, which made me sad because it meant no pool time. However we did some bowling. Tim's Dad kicked our butts but I didn't mind too much because earlier in the week we played mini-golf and I totally dominated. On our last day we took a trip to a wildlife preserve and experience nature first hand! We saw some birds and rare flowers. We watched an owl munch on some crawfish and that was pretty amazing. 


Since it was a vacation and I had some time on my hands I did some serious reading. I've been reading NOS482 by Joe Hill. This was also a recommendation from Caitie and since I'm a big fan of Hill's graphic novel, Locke & Key I thought I'd give it a try. After reading so many children's and teen's novels, its good to take a little break from those for a bit. It's really spooky and suspenseful. I described it to Tim and I said it reminds me of a Stephen King book. He laughed and sarcastically remarked "Gee I wonder why" Unbeknownst to me Joe Hill is Stephen King's son and I'm the last person on the planet to realize this. 


Sunday, March 30, 2014

The week that was.....


After taking a few months off, it was finally time to bring back Craft Night! We are going to be making Animal Collage art. Its pretty simple, we take a shape of an animal (in our case we have a bear, fox, doe and dog) and trace in on our ‘canvas’ (its really a piece of cardstock) then we take some strips of scrap paper or magazine pages and we make a collage to fill in the shape of our animal. I’m glad to be bringing it back, because its been too long. I’m also excited to hear how Callie is doing with Beans 2.0!


I also made this nifty chalk board! Every time I do a craft night, I write out the instructions, but its a bit time consuming. So I had some scrap wood around and I made it a chalkboard! (Fun fact, making chalkboards was a previous craft night activity, read all about it here)


I had a bunch of other scrap wood hanging around. I have a lot of left over 3 by 7 inch blocks, so I thought I'd do something with them. I started making a bunch of hanging signs! Of course I made some Doctor Who themed signs. I also made a one saying Bonjour! I think I'll make some more with greetings in different languages.


I am thinking about making a nautical theme sign for Iron Craft. The next challenge is all about Trends. Of the trends suggested, I really like the nautical trend. When you live on an Island, you see a lot of houses with nautical motifs. I like a more subtle approach, no sea shell lamps or signs saying "Life is a Beach" for me. I'm not sure what I'll do but I'll be sure to tell you about it.


I've been continuing on my reading marathon. I'm catching up on an award winner I missed. The librarians at work are always raving about Three Times Lucky and it won a Newberry Honor. I thought I would check it out. I got my next reads few reads lined up to keep my roll going!


Related Posts Plugin for WordPress, Blogger...