Showing posts with label Kids Crafts. Show all posts

Thursday, June 13, 2013

Father's Day Card - Kids craft

So Father's Day is just around the corner. Did you take care of your pops?! Here is the card I made for my Dad. Even though he doesn't currently have a mustache, he had one for a long time so it still works.

Pops and I


I helped the youngins at work create their own Father's Day cards. It uses the concept of negative space, which of course will go over the little ones heads, but thats ok. Its a fun craft for any age and the results look pretty awesome. This technique can also be adapted for just about any occasion. Here is what you can do to make your own!


Materials & Tools: 

  • Card Stock
  • Contact paper 
  • Scissors 
  • Crayons 

Instructions

  • Trace and Cut out some letters out of contact paper. (or shapes if your doing something else) 
  • Peel and stick the letters on the cardstock 
  • Break out the crayons and go nuts! You can scribble or make patterns, have fun with it!
  • Peel off the letters to reveal the card.
  • This is an additional step, I printed out a little father's day poem and had the kids glue it into there cards. 


Wednesday, January 23, 2013

Snowflake Sun-catcher (Library Life)


Here is a simple craft that is perfect for January, the Snowflake Sun-Catcher. Although it hasn't really snowed that much this year, January is when I usually break more winter themed crafts. I saw this technique in the Muppet's Craft Book. In the book they used crayon shavings where I used tissue paper and you still get the same kind of look. This craft is also perfect for the little guys. I did this with ages 2 - 3 and a few older siblings even joined in and made their own! This same technique can also be used to for different occasions such as hearts for Valentines day or even shamrocks for St. Patrick's Day.

Here is how we made the sun-catchers!

Materials & Tools

  • Snowflake shapes 
  • Tissue paper 
  • Glue 
  • Wax paper 
  • Iron 
  • Hole punch
  • Yarn 

Instructions


  • To prepare, I had cut out snowflakes using a die cut machine. I also cut up different colored tissue paper squares. I used the wax paper and cut out circles (big enough to fit the snowflake)


  • Next, glue tissue paper squares to both sides of the snowflake.
  • I set up an 'iron station'. Kids came up after they were done decorating both sides
  • Sandwich the snowflake in between two pieces of wax paper and iron. 

  • Punch a hole and string with yarn and hang them up! 


Sunday, August 26, 2012

Spooky Bats - Kids Craft


Attention all Librarians, Teachers, Moms anyone in need of a simple kids craft! Check out my spooky bats!


I had a lot of fun developing programs for this years Summer Reading Club with the theme, Dream Big - Read! There was a lot of fun different ways to interpret the theme. Since author/illustrator Brian Lies created the art work for the theme this year, I felt it necessary to use his book, Bats at the Library as inspiration for this kids craft! The book was also a great companion to the craft! With Halloween around the corner these bats make perfect decorations that your youngin's can help make!

Materials & Tools: 
  • Bat Shape
  • Oak Tag (in both black and white)
  • Tissue paper (in black and purple)
  • Clothes pin
  • Crayons
  • Scissors
  • Glue
Instructions:

  • Create a bat body out of black oak tag
  • Cut out two circles out of white oak tag
  • Cut two pieces of tissue paper (black and purple) that measure 15 x 9 inches

  • Glue eyes to the bat body 
  • Use your crayons to decorate and customize
  • Place your bat face down and get your clothes pin ready! 
  • Dab some glue on the back of the bat body and attach the clothes pin 

  • While your bat is drying, time to work on his wings! 
  • Grab your pieces of tissue paper and lay one over the other, then begin to accordion fold the paper
  • Pinch in the middle and fluff out your wings


  • Take your wings and clip it to the clothes pin 


  • Turn your bat over and clip him any where you want!


Friday, April 6, 2012

April Fool's Day

April Fool's Day is quite the fun kid friendly holiday so I decided to create an April Fool's program for the library. Here is how you can do it in your classroom, library or at home.

Great read aloud for April Fool's Day
Generally with a library program you need a story to go along with the theme of the program! There aren't too many great books for April Fool's to read aloud but Guess Again by Mac Barnett does the job. Mac Barnett is quite the funny man. This book features silhouettes and a little poem about what it could be and the audience is tricked every time! (My favorite is the Viking)


I had a hard time figuring out what craft to make. After researching some April Fool's Day facts I saw a picture of a Court Jester and had an A-HA! moment and the kids decorated and made their own Jester hats. It was pretty simple to make. Just a few construction paper triangles (of varying colors) then attached it to an oak tag strip used for the head band of the hat. To jazz things up a bit I put out some markers, scrap pieces of paper (junk that we needed to get rid of) and let them decorate until their heart's content. When they were all done we stapled up the hats and they were on their way. To make it look more court jester-y I took a marker and curled up the triangle on the top.

Thursday, March 15, 2012

Dr. Seuss & Truffala trees!

In the Children's library world March is associated with a very special birthday, Theodor Geisel (a.k.a. Dr. Seuss)


This year I got to do a few special things. First I made this super awesome bulletin board.
I found this Dr. Seuss quote and loved it, it also fit in the library perfectly. Then I referred one of the Cat in the Hat books and sketched a mock up. I gave to Port Jefferson Library's resident artist, AnnMarie and she make a large scale version and TA -DA! it looks pretty neato

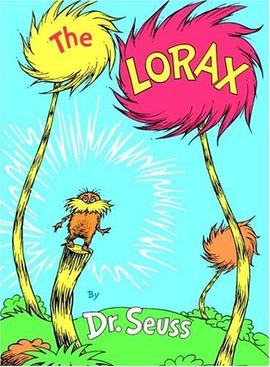
My Dr. Seuss March madness did not end there! If you must know the Lorax feature film was recently released (which I really hate what cinema has done to some Dr. Suess classics but that's besides the point). I figured it would grab the attention of some kiddies so I did a Lorax program! And if you don't know the Lorax.. why he speaks for the trees! So I decided we should make some Truffala trees.

You can to it's really easy! All that you need is:
Construction paper (I used yellow and red)
Glue
Tissue Paper
Stapler

  • I took the red construction paper and made two circles measuring 6 inches
  • Then I stapled them together in three spots and left and opening on the bottom
  • Then kids then decorated the red circle with different colored tissue paper squares (this is the top puffy part of our tree)
  • Then they got to decorate the yellow piece of construction paper that was 8 x 11 inches 
  • After decorating the tree trunk we rolled it up and stapled it then place the puffy part on the top
  • Instant truffala tree!
Related Posts Plugin for WordPress, Blogger...