Showing posts with label crafting. Show all posts

Tuesday, May 13, 2014

Monogram Candle Holder

I have been making some pretty amazing things lately with the help of my glass etching kit. Its a special cream that is applied to a glass service and gives it a frosted or etched look. I've played around with frosted glass spray before, but the etching cream is superior. Etching is perfect for projects with a lot of detail and washable items. I found that the spray wipes off and is not super durable. So the etching cream is perfect for making custom wine glasses and things like that.


Here is one of my latest projects, a monogramed candle holder. It came out looking pretty snazzy. I stuck in my guest bathroom because it needs a little decor. 

Here is how I made it: 

Materials & Tools:

  • Etching Cream 
  • Contact Paper 
  • Exacto Knife 
  • Glass Vase 
  • Gloves 
  • Foam Brush
  • Candle 

Instructions:


  1. Create your stencil. I went with a monogram, but you can use whatever image you like. I recommend something simple and not very complicated. Draw your design on contact paper and cut it out with your exacto knife. 
  2. Clean your candle holder and then apply your stencil to it. Make sure to press out all of the air bubbles. 
  3. Before applying etching cream, wear protective gloves! That stuff is serious business and can damage your skin. 
  4. Apply a few coats of etching cream over the stencil. 
  5. Allow cream to dry. Some of the manufacturer directions vary, but I found waiting 24 hours gets the best results. 
  6. Take your candle holder and run it under warm water and take off the stencil. You will noticed your design has been etched! 
  7. Fill your candle holder with whatever decorations you would like. 

Tuesday, May 6, 2014

Pointillism Vase


Iron Craft Challenge # 9 is 'Inspired by Art' So it got me thinking of some of my favorite art pieces. One of them is featured in Ferris Bueler's Day Off and Cameron has a serious stare down with a Surrat painting. Its one of my favorite scenes in movie history! 


This painting uses the pointillism technique so I used that as my jumping off point for this project. It involves using a series of dots of varying colors to create a pattern in which an image emerges. Since I wasn't setting out to make a grand masterpiece I applied the idea to a small scale project, a small vase. I used an ampersand design (&) because they are just so neat and visually interesting. After my little vase was done I put some rocks in it and suck a candle in there. 

Here is how you can make one yourself: 

Materials & Tools
  • Glass jar or vase 
  • Contact Paper Stencil 
  • Q-tips 
  • Paint (varying colors)


Instructions: 

  1. Clean your jar/vase with some glass cleaner and dry it to remove any dust. 
  2. Apply your stencil to the jar/vase and press out the air bubbles as best you can.
  3. Take a q-tip and dip it in some paint and start dabbing your jar/vase over the stencil. Continue this step with different colors, until you like your color combination. 
  4. Allow to dry for at least 20 minutes. 
  5. Gently peel off stencil to reveal your wonderful design! 


Thursday, May 1, 2014

Crayon candles - Library Life

March is national craft month. So I thought be appropriate we do some serious crafting with the teens!


While looking for ideas I came across this project on Brit Co, using crayons to make candles!!! I've always wanted to do a candle making project but it always looks too complicated and dangerous in a group setting. This one however utilizes soy candle wax and a microwave. candle making made easy!


I gathered all of the supplies and we got to work! Go to Brit Co for the full tutorial, but here are some tips that I picked up while adapting this project for a group.

Crayon Candle Tips:

  • Use Crayola crayons. There is some sort of special wax only in Crayola crayons that makes them melt. I tried with other types of crayons and it just doesn't work. Crayola only! 
  • Waiting for each layer. I didn't realize that each layer needed to try before pouring on the next one. So while we waited for each layer, we played a few rounds of Apples to Apples. 
  • Depending on how big your microwave is, you can melt up to four cups in the microwave all at once! That will help if you have a fun program of kids.
  • Be wary of the wicks! The wicks can get a little wobbly, so when pouring in the wax, make sure your keep it straight standing up! Mine shifted to the side and looks weird. 


Tuesday, April 29, 2014

Key Chain Wristlet


My pile of scraps have been growing. So I decided to do something about it and I've been doing a few different scrap busting projects. One of them is making a keychain wristlet. They are easy to make and they look great. They are also really durable. When the strap on my clutch wallet broke, I replace it with a wristlet, and its been working out quite nicely.

Here is how you can make your own: 


Materials & Tools: 

  • Scrap fabric 
  • Snap hook 
  • Sewing machine & notions 
  • loop puller 
  • Iron

Instructions 

  1. You will need two pieces of scrap fabric that measure, 2" by 11" (FYI be careful of the fabric you use, you want something nice a durable, but not took thick because you will run into problems later) 
  2. Place the right sides of fabric together, pin and sew along the long edges. Leave a 1/4 inch seam allowance. Congrats, you made a tube!
  3. Use your loop puller and pull your 'tube' inside out. Use your iron to press the 'tube' so it is nice a crisp
  4. Top stitch along the long edges
  5. Insert 'tube' through the snap hook and fold it so that the two short edges are together. Pin and sew along the short edge 
  6. Flip the strap around, so that the other side is exposed. Move the sewn short edge over to the snap hook. 
  7. Pin and top stitch above where the snap hook is. This way you can cover up the raw edge and give your wristlet a nice finished touch.
  8. Put some keys on it and you are good to go! 

Make one yourself! I've been having a lot of fun making all different kinds of wristlets! 


Tuesday, April 22, 2014

Iron Craft Challenge 8 - Spring has Sprung - Teired planter

Spring is finally here!!!! This means I can start sprucing up the outside of the house. The front of our house needs a serious pop of color. It is very white. I thought a painted planter would help! 

This planter project also meets the requirements of the latest Iron Craft Challenge # 8 - Spring has Sprung! The task for this challenge was to make something inspired by spring or Easter. 


Since big planters can be kind of pricey, I thought about making a tiered planter. Since terra cotta planters are inexpensive, I bought three of varying sizes. I took them home and spray painted them with some color. I painted the top rim gold and the bottom a dark green. After I put it together I realized it looks like a Zelda inspired planter which was no my intention. 


After painting, I began to layer them together with soil and plastic planter turned upside down. That way you don't have a ridiculous amount of soil. After putting it all together it didn't seem very sturdy. I was worried about the wind blowing it over. So I had a dowel in the garage and was able to use that to keep it all together. 

It came out pretty fantastic! Now I just need to put some flowers in it! 


Monday, April 21, 2014

Latest Adventures....

Here are some of my latest adventures....


Last Friday Caitie and I went on a grand journey to Ikea! It is such a magical home decor wonderland. We got so frustrated because we wanted to buy EVERYTHING! I went with one goal in mind, a floor lamp. $70 later I left with a bunch of crap I'm not sure if I really needed. We were both really obsessed with this crazy lamp that looks like the death star when closed, then when open it looks like the death star mid explosion! 


Sadly I left without the buying the lamp....this time! In the middle of our spree we got a bit peckish so we got some food. We had the most delicious elderberry cupcake in the world. I'm really dead set on finding elderberry liqueur just so I can make these cupcakes! It was like a little puff of heaven. It was light with a little buttercream frosting.

I haven't been doing too much on the crafting front, but I do have a few projects lined up. One of them is a part of an Iron Craft Challenge. This next challenge is all about Spring! I'm excited to transition and get away from the cold. I love living in a climate where I get to experience all of the seasons, however I am so done with winter! So for the Spring challenge, I plan on making a tiered planter. I'm going to paint it some nice color and put it on our porch.


This past week was also a special Etsy landmark for me, I've made 70 sales! I know it doesn't sound like much but the fact that I've sold 70 of my handmade items to mostly to people I've never met, is pretty amazing. The big 70th sale was to someone I know very well, my aunt! I'm planning on making her something extra special.


Another sale I made was my first custom order. I'm custom wall hanging sign for someone. It came out great and I hope she enjoys it!


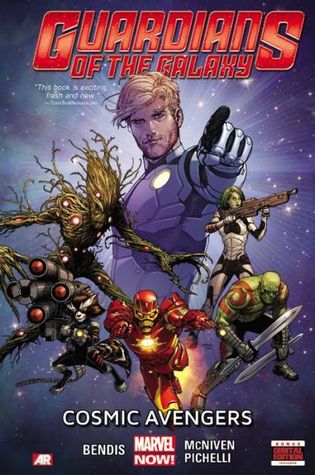
I've been doing a lot of reading lately. Since I got my floor lamp from Ikea, I set up a little reading space and I still their for hours at a time enjoying a good book and some coffee. Its pure heaven! After finishing NOS402, I switched gears and read Guardians of the Galaxy: Cosmic Avengers. The trailer for the movie blew me away, so I figured I'd read about these marvel characters I know nothing about! They are a rag tag team of galactic rejects. Its an enjoyable read and I love Rocket. When he is in a shoot out he says "Blam murdered you" at all of his enemies and its quite silly.


Since Guardians was a quick read, I picked up Prodigy by Marie Lu. I've read the first book in the series, Legend and immediately went into the next one. I think that was a mistake because I was just not feeling it and I stopped. I guess I need a break in between reading a series book, because second time around, I am enjoying it. If you are a fan of dystopia, then go check it out.


Tuesday, April 15, 2014

Iron Craft - Trends (Nautical Planter)


We have gotten a few little Spring teases. Its gotten warm, then the next day is freezing. The weather may not be agreeable, but I am ready for Spring! I decided if I can't make it happen out side, I'll bring a little bit of spring inside! So I decided to add some houseplants to our decor. I came across these planters at the Dollar Tree and thought I'd decorate them.


This also went along with an Iron Craft Challenge, Trends. Crafters were able to do a project inspired by some of the latest trends, which included floral, geometric or one of my favorites, nautical.

When you live on an island, a lot of people adopt the nautical theme in their houses. I like the motif but some people cover their houses in sea shells with clever signs that say "Life is a Beach" I prefer a more subtle approach to the nautical look. I'm really drawn to nautical stars and compasses. I don't know why but they are just so cool and look old-timey.


So I decided to add some nautical flair to my planter! And it came out pretty snazzy! Here is how I made my nautical planter.

Materials & Tools


Instructions

  • I used pickmonkey and used their nautical star overlay
  • I printed it out and traced it onto some contact paper and cut it out with the exacto knife 
  • I then took my planter and made sure it was nice and clean, then I positioned it on my planter
  • Next it was painting time! I used Martha Stewart's Gunmetal paint 
  • I gave it a coat or two and let it dry 
  • After I let it dry for a bit I peeled off the contact paper to reveal the design


Sunday, March 30, 2014

The week that was.....


After taking a few months off, it was finally time to bring back Craft Night! We are going to be making Animal Collage art. Its pretty simple, we take a shape of an animal (in our case we have a bear, fox, doe and dog) and trace in on our ‘canvas’ (its really a piece of cardstock) then we take some strips of scrap paper or magazine pages and we make a collage to fill in the shape of our animal. I’m glad to be bringing it back, because its been too long. I’m also excited to hear how Callie is doing with Beans 2.0!


I also made this nifty chalk board! Every time I do a craft night, I write out the instructions, but its a bit time consuming. So I had some scrap wood around and I made it a chalkboard! (Fun fact, making chalkboards was a previous craft night activity, read all about it here)


I had a bunch of other scrap wood hanging around. I have a lot of left over 3 by 7 inch blocks, so I thought I'd do something with them. I started making a bunch of hanging signs! Of course I made some Doctor Who themed signs. I also made a one saying Bonjour! I think I'll make some more with greetings in different languages.


I am thinking about making a nautical theme sign for Iron Craft. The next challenge is all about Trends. Of the trends suggested, I really like the nautical trend. When you live on an Island, you see a lot of houses with nautical motifs. I like a more subtle approach, no sea shell lamps or signs saying "Life is a Beach" for me. I'm not sure what I'll do but I'll be sure to tell you about it.


I've been continuing on my reading marathon. I'm catching up on an award winner I missed. The librarians at work are always raving about Three Times Lucky and it won a Newberry Honor. I thought I would check it out. I got my next reads few reads lined up to keep my roll going!


Monday, March 10, 2014

Iron Craft # 5 - A is for ....


So I've take a bit of a break from the last few Iron Crafts, but I am back! 

This time around the challenge was called, 'A is for...' Crafters were given to task to do something either inspired by the alphabet or something that begins with the letter A. One thing I love about these Iron Craft Challenges is that they are open to interpretation. So I went with A is for applique! 


I recently got the fabric blade for my silhouette machine. I was excited to be able to put it to good use! It was incredibly easy to use and the results are pretty amazing. 

This challenge was coincided with distaste for my couches throw pillows. I was sick of them so I decided to make a few new ones. I wanted to make one featuring my two favorite dopes, Gyspy and Bmo. I also made one featuring a stag head, I just think its an image that looks cool. 


I still have two more pillows to replace. I've got a few ideas of what I can do, I'll be sure to tell you all about it. 


Sunday, January 26, 2014

Decorative Plates


I've gotten really sick of stark bare walls and I've been trying a few different things to really liven up our dinning room. I found this mirror for 20$ at Marshall's (score!). It was a little cracked and boring white. So I gave it a goat of gray to really spiff it up. I hung it opposite some windows. That is a design trick that is supposed to make the room feel bigger. I have our Parisian street art pictures hanging on another wall, along with a little flying birdie my friend Margaret got me. However that still left some blank spots in the room. What to do?


Originally I had planned to start collecting graphic plates and hanging them on the wall. That hit a snag when I did not like anything I was finding, either in the design or price. So I decided to put my own DIY spin on it and made some plates of my own! I abandoned my plan of an entire wall of plates and decided to hang them on each end of the windows. It makes it look balanced and we now have plenty of visual interest in this room!


Materials & Tools

  • White glass plate 
  • Spray paint (two contrasting colors) 
  • Contact paper 
  • Exacto Knife 
  • Plate hanger 

Instructions 

  • I recommend purchasing plates from the Dollar Tree because they come in different shapes and sizes and they are only a dollar so if you make a mistake its not a big deal. 
  • Plan out a design, make it simple and not too intricate. Trace and cut out the design on contact paper (or if you have a silhouette machine just use that) 
  • In a well ventilated area, spray paint a base coat. (this should be the color you want your actual design to be) Allow design to dry. I recommend letting it sit over night.
  • Peel out your design and stick it on the plate
  • Spray a top coat of a contrasting coloring and allow to dry. (don't wait too long because you run the risk of peeling off the paint from your design) 
  • Allow the paint to dry for at least a day before you hang it up. (otherwise your house is going to smell like paint fumes) 


Linking up with: 


Wednesday, January 15, 2014

Leather Bag Straps


It's another year of Iron Craft challenges. I had fun participating last year and am glad to do it again. Iron craft is a series of challenges organized by Just Crafty Enough. Every two weeks a new challenge is announced. Each challenge has a theme and it is up to the crafter to interpret the challenge to make their project. Crafters have about two weeks to complete the project until reveal day. Finished projects are revealed on the group's Flickr page where you can see everyone else's.


This is Iron Craft's third year. As a celebration of its third anniversary the craft is all about the traditional gift of leather. A while back for my birthday, I gifted myself a snazzy leather crafting kit. I have been caught up with stuff that I haven't been able to actually use it! So finally an excuse to use it! 


After making bags for a while, one of the most annoying things to make has been straps. They are usually not durable and feel flimsy when made out of fabric. So I thought of giving some leather straps a try.

Last week most of the country was in the midst of a wintery blizzard storm. My own little corner of the world was no exception. I had an unexpected two days off and snowed in. It was the perfect opportunity to craft! This bag is the result.


I've combined a lot of my favorite techniques and the end result came out quite nice. I added a front pocket and a magnetic snap. There is also a recessed zipper and interior pocket. I went through some of my previous stencil designs and I came across a platform 9 3/4 sign, so I thought I would use it for the bag.  The bag was topped off with leather handles.

I was intimidated! I read stuff on leather and I wasn't sure if I had the right needle or if I needed a walking foot and I wasn't sure how I was going to do this with out pins. Luckily it went well. Here is what I did to make them.

Materials & Tools

  • Faux Leather
  • Leather Took Kit 
  • Sewing machine and notions 
  • clothes pins 
  • Scissors 

Instructions 

  • Wal-Mart is always a toss up when it comes to a selection of fabric. Luckily they had a lightweight faux leather. I liked it because it was easy to work with and manipulate. So keep that in mind when selecting material. I purchased a 1/4 of a yard
  • Measure out and cut your pieces. I ended up measuring 3 inches by 24 inches and cut out two pieces.
  • Take one of the strap pieces and fold it in half, then fold each piece in again to the half fold. 
  • As I was folded I clipped them with clothes pins. (Because pins would ruin the leather, the clothes pins do a good job holding them in place) 

  • Then I sewed each edge of the strap
  • Since the edges were raw I folded them over and top stitched over them
  • After both straps were done, I then attached the straps to the bag


Related Posts Plugin for WordPress, Blogger...