Showing posts with label Halloween decorations. Show all posts

Thursday, October 17, 2013

Spooky Ghost Mirror

Here we are again with another Halloween tutorial. While on a regular visit to the dollar store (one of my favorite spots for craft supplies) I spotted a small mirror by the picture frames. I thought I could do something fun with it so I grabbed it. I thought of making a spectral being or writing a spooky warning on it! So I set out on my mirror adventure!

I used my old friends, frosted glass spray and contact paper. I created a design and made a stencil out of contact paper and cut it out. After placing it on the mirror I sprayed it with a coat of frosted glass. After it tried I took up the contact paper to reveal my ghost! Here is a step by step tutorial so you can make your own scary ghost!


Materials & Tools

  • Mirror (I found mine at the Dollar Tree) 
  • Contactpaper 
  • Pen
  • Exacto Knife
  • Frosted Glass Spray 

Instructions 


  • First come up with a design! I went with a Halloween theme, however you can use the same technique to make just about anything. Once you have a design you like, draw it on the back of your contact paper. Be aware that the image must be flipped, otherwise you'll end up with it not looking like you planned. 
  • Once your desk is done, you can use an Exacto knife to cut it out.
  • Clean your mirror before the contact paper is applied.
  • Peel the contact paper pieces and place them on the mirror. Make sure all the air bubbles are pushed out
  • If their are any inside bits place them in the right places. Inside bits are things like the ghosts eyes and his mouth. 
  • Take your mirror outside or in a well ventilated area. Spray it with the frosted glass spray and allow to dry
    • TIP: don't spray too close. The contact paper will crinkle. Also you don't need to spray a lot. It might not seem like  you didn't spray enough, but the frost effect takes a few minutes before you can see it. So be patient! 
  • You must give it a good amount of time to dry other wise the frost will come up! 
  • After it is dry you can peel the contact paper off to reveal your ghost- BOO! 

If you like this one, then check out some of my other Halloween tutorials!


Thursday, October 10, 2013

Monsters Display - Library Life

Since October is upon us it was time to update my display! I was trying to think of a good idea for this one. I didn't want anything too scary or too cheesey. I didn't want to put 'Read BOOOOOks'. I like a good pun but I wanted something clever! When I came across the quote 'A Book a Day Keeps the Monsters Away'  I knew what to do!


I had my quote, now I needed some monsters! I thought I would use some literary monsters including: Leonardo (the terrible monster), Ed Emberly's Big Green Monster, Grover and Mike Wiskowski. I enlisted the help of our resident artists, Morgan and Annmarie. They constructed these guys and they came out awesome! The used some cool spooky fonts on picmonkey and cut the letters out on my silhouette machine.


Tuesday, October 8, 2013

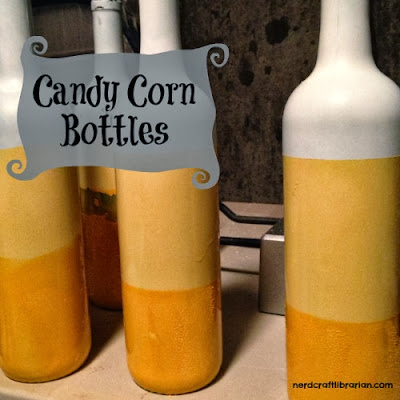
Candy Corn bottles


With October in full swing I have been doing more and more decorating each day. I added some flair to our front yard complete with cornstalks! I'm quite proud of myself and how it is coming together.


I've also been doing a lot of indoor stuff and one such project is turning old wine bottles into something spooky. Here is how I've made some candy corn bottles!


Materials & Tools

  • Recycled glass bottles 
  • Spray Paint in these colors: 
    • white
    • Orange
    • Yellow
  • Painters tape  


Instructions

  • Remove the labels from the wine bottles. You can check out in detail how I did that for my potion bottle tutorial
  • Once the label has been removed and the bottle is dry, you are ready to spray paint! Make sure you are either outside or in a well ventilated area. I use a dust mask while painting. 
  • For the first coat, paint the entire bottle white. Then allow to dry and remove the tape.
  • 1/3 of the way down tape up the bottle and get ready for your second coat. To prevent your next color from bleeding over take a piece of newspaper and wrap it around the bottle. Spray paint yellow and allow to dry and remove tape.
Painter's tape fail
  • I've learned that my painters tape is super duper strong and ripped up the paint. So for the last coat I wrapped some newspaper around it while I spray painted. 
  • Now you are ready for some 'corny' halloween fun! 

If you like this craft then check out some of my other Halloween Tutorials! 


Sunday, October 6, 2013

October and Salem Haunts..

We are in October! Which means I can officially allow myself to decorate full on Halloween! I've already started with some Halloween jams (like Ghostbusters) 


I've also gotten into the spooky spirit at work. My latest bulletin board display features some literary monsters. Can you name them all? 


This past Friday was also birthday...woooo! To celebrate we decided to take a trip up to Salem. Its something we have always wanted to do in October. It was quite a magical place. 


If you aren't too familiar, Salem is a historic town in Massachusetts famous for accusing several of its citizens of witchcraft. It really comes alive during October because of Halloween. There were a ton of fun spooky things going on around town. We did a haunted ghost tour and saw this really creepy ass house and heard some stories of spectral encounters. 


I loved just walking around the town. It was a neat place to explore. A lot of the shops were fun to explore. There was even a Harry Potter store! It was amazing! I got a butter beer candle from them. 
We also went to one of the many museums there. This one was kinda cheesy but we had fun goofing on it. While exploring the town we came across this house in all its Halloween decorating glory. I was quite impressed so I put it on instagram. In a weird small world type twist, the owner of the house found my post and liked it. 


All in all I had a great birthday and Salem is a fun town. We will definitely be going back again soon.


Wednesday, October 2, 2013

Halloween Wall Art

Hello Girls and ghouls! I'm happy that it is finally October! Its the month of birthdays (Tim and mine have birthdays two weeks apart) and its also the month of spooktacular fun! Last year I posted a few different Halloween themed tutorials including Halloween potion bottles and burlap bunting.  This year is no different! I'll have a different tutorial each week to help get you in the spooky spirit.


We're starting off with an easy one! Halloween Wall Art! They are easy and fun. I had a lot of fun looking up funky old timey clip art! Here is what I did to make my wall art here is how you can to:

Materials and Supplies:


  • Picture Frame (I went with 8 x 11 from the Dollar Tree) 
  • Sand paper 
  • Spray paint 
  • Halloween clip art


Instructions


  • Open up the picture frame and carefully remove the glass and put it in a safe place. 
  • Use your sand paper and rough it around the edges of the picture frame. (this will help the spray paint adhere to the frame) When you are done make sure to wipe away any saw dust. 
  • Use some white paint and do a base coat. Allow to dry.
  • Pick out some holloween-ish colors and start spraying it down. Allow to dry 
  • Now the fun part, find your art work! The Graphics Fairy lives up to her name and is quite amazing. 
  • Once your frame has dried, put together the frame and insert glass and your pictures. Now you are read to decorate your house! 


Tuesday, October 30, 2012

Halloween Party recap!

This weekend has been a crazy! Its one for the record books! Right now Tim and I are held up in the house as we are waiting out the storm. I had not one but TWO days off! I hope my library is ok! I have been putting the unexpected free time to good use and its given us time to clean up after our epic Halloween shindig! 

We were checking out the full moon! 


I know I have been going on and on about the party on here and it all led up to Saturday night. It was a lot of hard work and pretty stressful but we had a great time! Here are some pics of the festive decor! 


Tim and I worked pretty hard on the menu and it consisted of some spooky horror-derves from 'Spider Eggs' (meatballs) to mummy dogs (cocktail wieners). I also had some delicious drinks including ecto-cooler and butter beer. 


Another big part of the party were the costumes! It was a great year for costumes this year and I made side by side comparisons of some of the great costumes of the party! I went as Link from one of the all time best video games every, Zelda.  I made the costume myself! 

Tim went as Max Fischer. He saved latin, what did you ever do?


Here are some of the other great ones of the night, enjoy! 


And for no real reason (other than it is hilarious) is my friend Tyler rocking out in a Cher wig. 


Wednesday, October 24, 2012

Prepping for Test & a party

This is me trying to stay awake after a study session. The exam is Saturday, which just so happens to be the same day as my party. Its a tough thing to study for because I really don't know what is going to be on the test. I just keep looking over my librarian notes and hopefully the stuff that sticks will be covered! I guess it goes with Halloween because the whole testing experience can be quite a nightmare.


It hasn't been all boring study time. I am sure you guys may be a little wee bit sick of me talking about Halloween, but its a fun silly holiday I rather enjoy so get used to it for one more week. As I am decorating the house and gearing up for the party I keep humming this song in my head. Its from the Nightmare Before Christmas which has got to be in my top 5 all time favorite films. Go feast your eyes and ears and enjoy this Halloween diddy.


Aside from Halloween decorating  Tim and I finally finished our coffee table. Tim did most of the work and the whole project was about under $100. This was possible thanks to Pinterest! It lead to me the blog DIY Vintage Chic. This chick is pretty hard core and she even made her own stain. (We just bought stainer) Here is the post so check it out! 


Now back to Halloween, Tim and I watched Rosemary's Baby. Its about a woman and literally one hell of a pregnancy. I don't want to spoil it for anyone who hasn't seen it but it certainly scared the ba-geezes out of me on many different levels. Let's just say its influenced me to post pone the start of our family by a few years. In the spirit of the  Halloween season I want to know what your favorite scary movie is?


Tuesday, October 23, 2012

Halloween Potion Labels - Tutorials


So I have been doing some more bits of Halloween decor and this is one that I absolutely love and I am excited to share it with you! I remember seeing Halloween bottles at stores with all of the other Halloween stuff and I wanted them! Then I saw how much they cost... I rethought that and figured that I could make them. I used some inspiration from Harry Potter and most of the potions are from the magical world, with the exception of Frog's breath, that is from the Nightmare Before Christmas.

Here is how you can make your own spooky potion bottles!

Materials & Tools
  • Empty wine/beer glass bottles 
  • Bucket filled with water & dish soap
  • Sandpaper
  • Color printer 
  • Mod podge 
  • foam brush
  • Glow and the dark paint (optional) 
Instructions

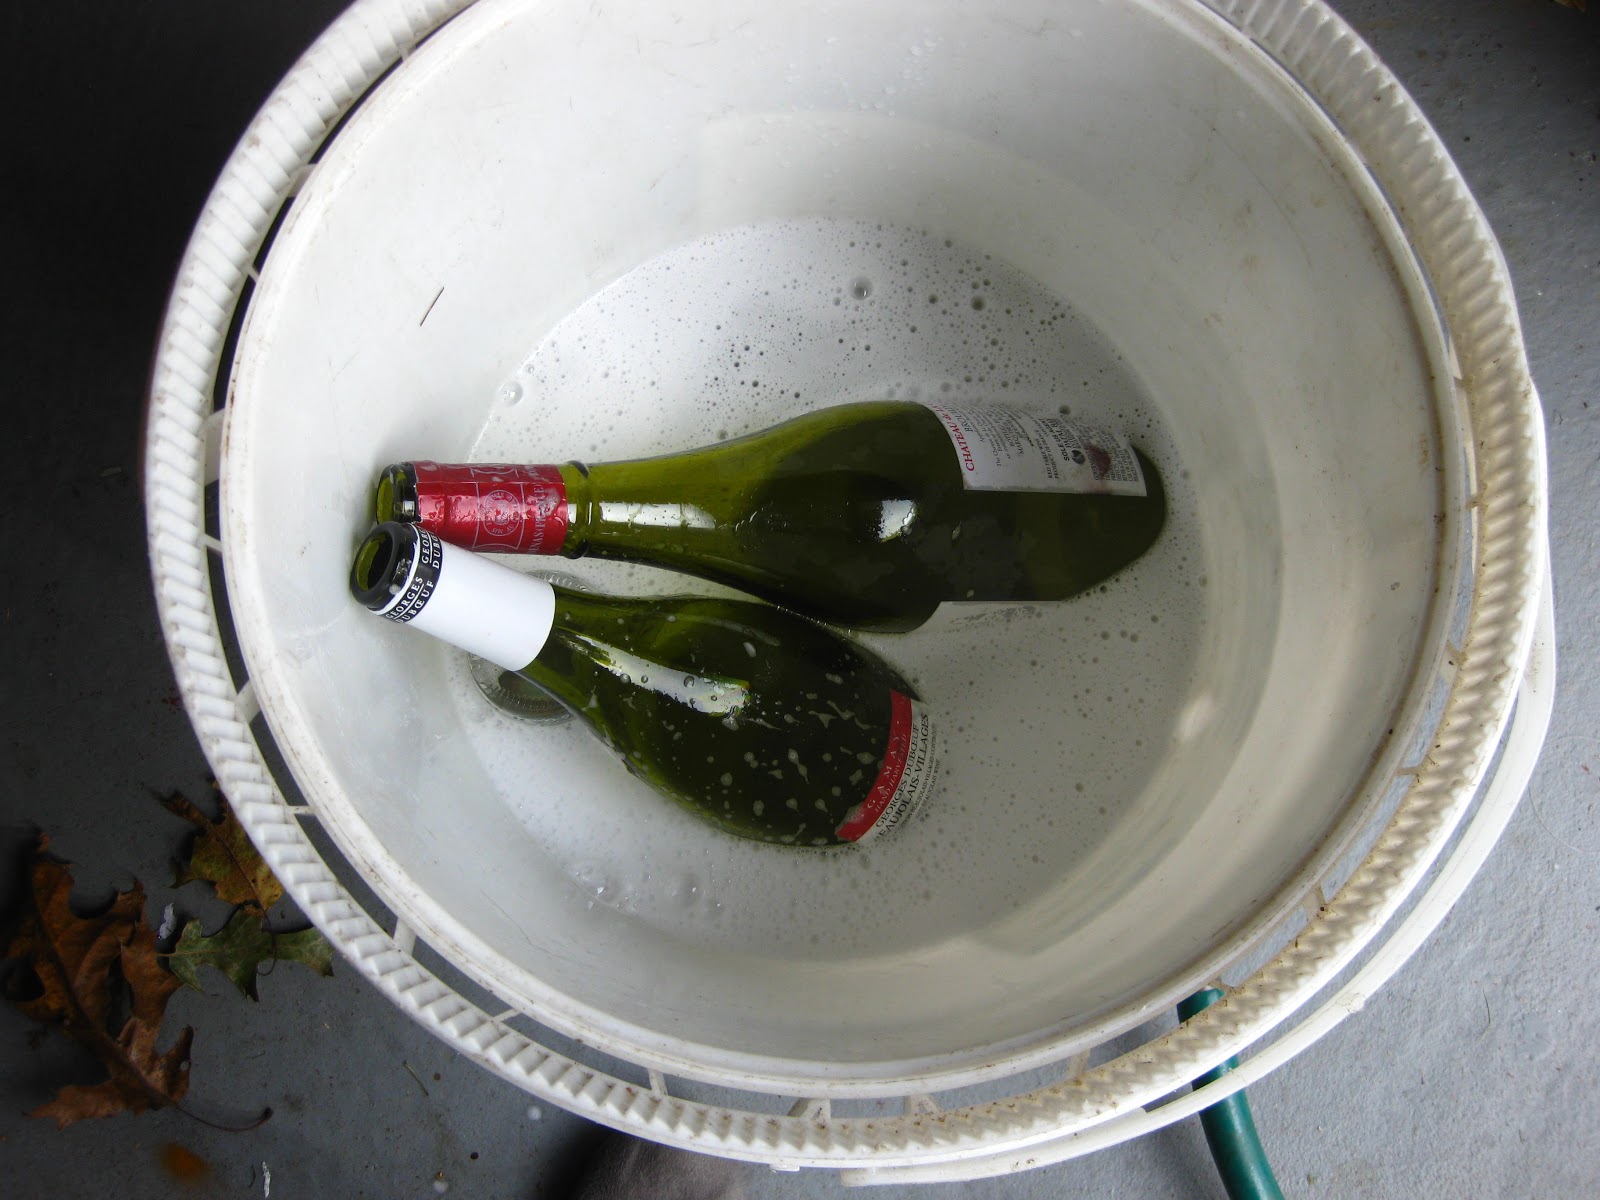
  • Break out those bottles you saved with have those pesky labels on them! Luckily they are easy to remove. Let the bottles soak in the bucket filled with water and a bit of dish soap. 

  • After it has soaked for about 8 hours, you can remove labels. It might be a little hard so use the sandpaper to scrape the labels off. Let the bottles dry a bit. 
  • Go to your computer and go to the website picmonkey.com. If you are unfamiliar the site, it is one of the best and simple to use photo editors. Start with an image then ad a white overlay, combine layers and now you have a blank slate to make your labels! The best part...its free! So play around with it and you the special Halloween themes to make some great labels! 
  • If you don't enough time to make your own labels feel free to use mine! 


  • After all of your labels are printed out cut them out and decide which labels are going to be put on which bottles
  • When you are ready to attach the labels break out that mod podge! Slap on a few coats then let it dry


Sit back and enjoy your spooky potion bottles! If you want to add a bit to it use the glow and the dark paint on paint over the labels, it goes on clear and will glow under a black light. 

- Sarina
Related Posts Plugin for WordPress, Blogger...